|
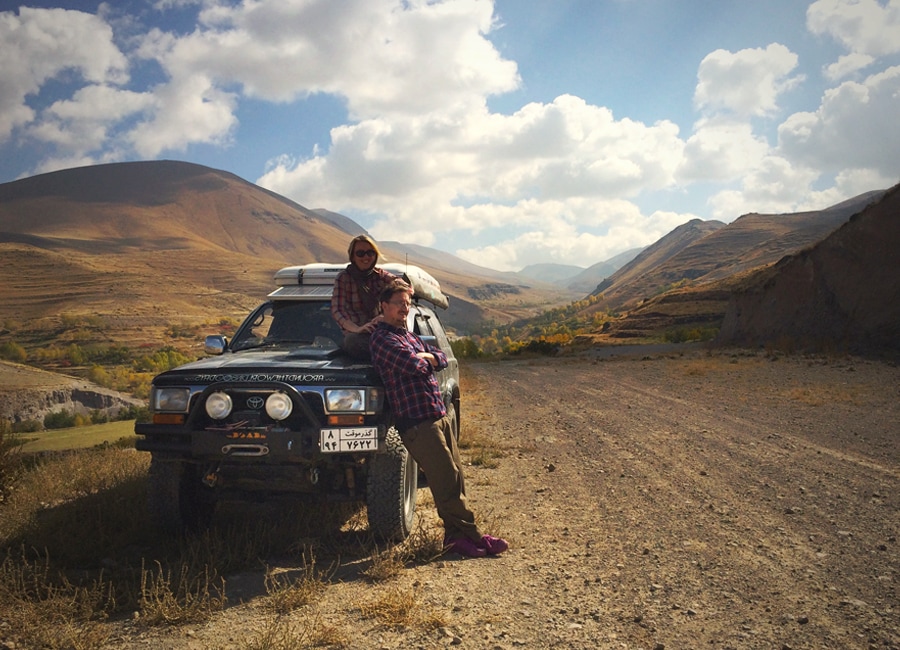
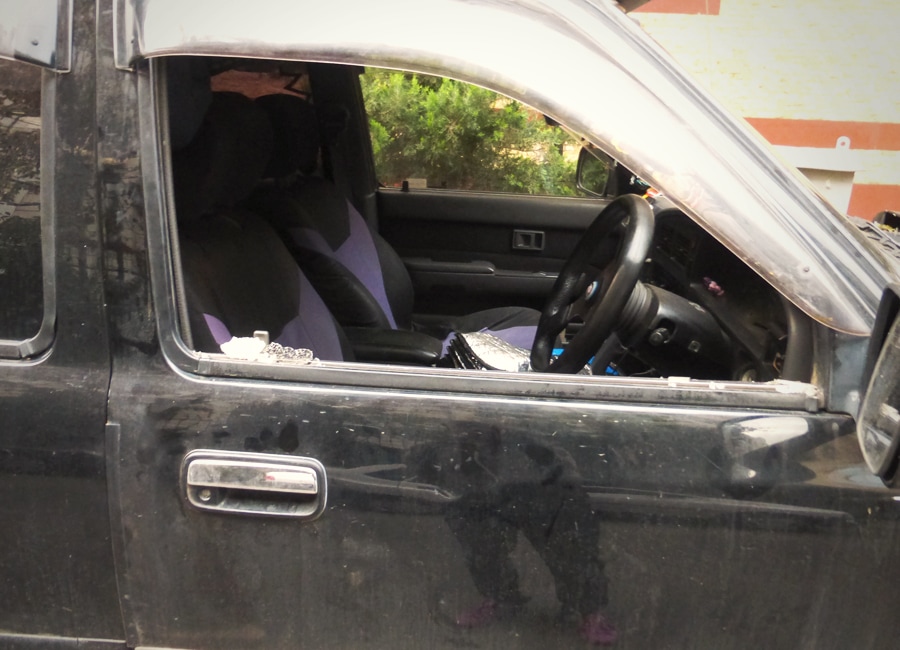
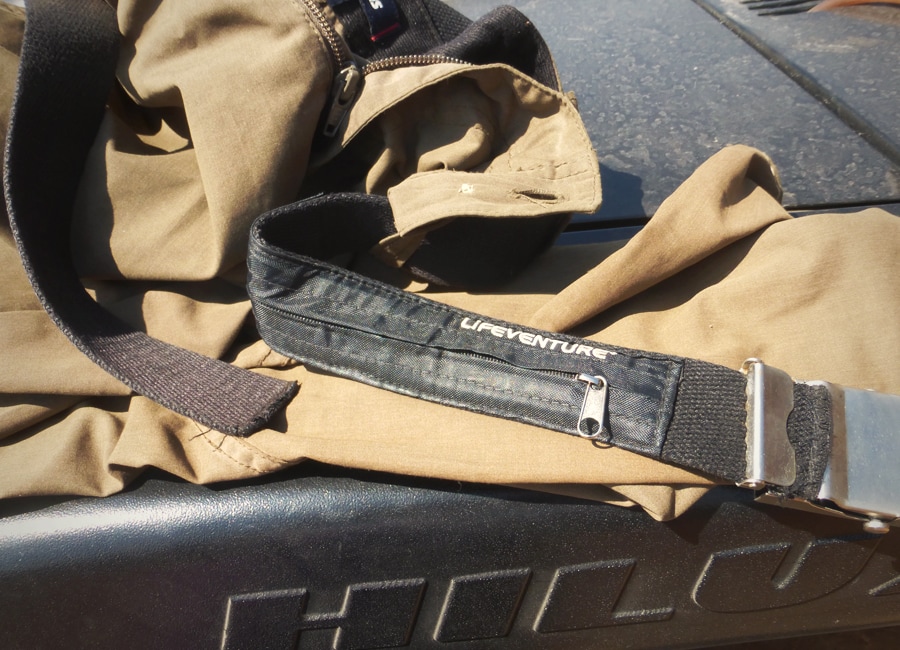
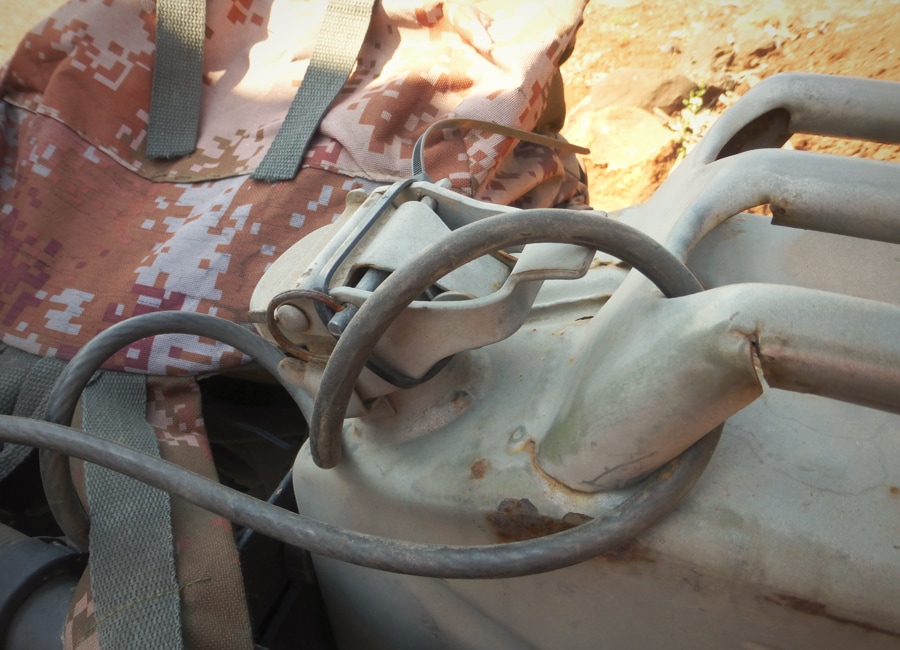
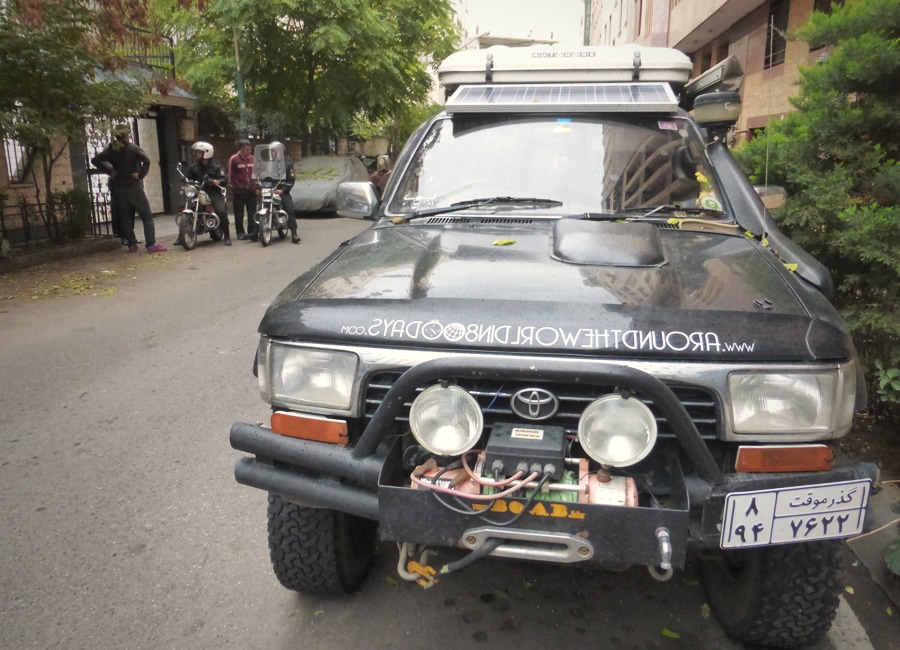
Most adventurous overlanders are typically drawn to the lesser-travelled, edgy countries. Travelling by 4x4 allows you to access some of the most beautiful, remote and sometimes inhospitable areas that most tourists generally don’t get to see. Travelling in a self-reliant way in a 4x4 does however mean you cannot travel light; typically your vehicle is your home and this includes carrying everything from tools and laptops to the kitchen sink. In most foreign countries a big muddy 4x4 with strange number plates, fully loaded with every conceivable extra is going to draw quite a bit of attention. As a result you, your vehicle and its contents can become a desirable target for criminals. After we’d purchased Bee-bee in 2010, one astute bicycle traveller sensibly told me “the less you take with you the less you have to lose”. These wise words are more pertinent having fallen victim to one of overlandings worst nightmares… robbery! Robbed In TehranWay back in 2015, we were robbed whilst in Iran. The thieves smashed the drivers side window and indiscriminately took 6 storage boxes containing clothing, car parts, tools, medical kit, camping equipment and personal items. Sadly, this included the box that contained Emma’s travel diaries, all our used maps and books plus every sentimental little souvenir and gift we’d acquired en-route. The financial loss was devastating but the inconvenience and time wasted was really problematic. What We Did RightThankfully cameras, laptops, phones, hard drives, credit cards, money and passports were all with us in the apartment where we were sleeping. Both Emma and I carry a micro SD card on us at all times in a hidden pocket in our ‘Adventure belts’, this memory card contains digital copies of all our important documents including the vehicle registration, passports, carnet, visas, medical records and prescription details. We have also emailed ourselves and a reliable family member a copy of this digital folder that can then be viewed using any device connected to the internet. Had we lost the entire car we would have still had access to our vital documents, this would have certainly sped things up at the police station and embassy. Photos are simply irreplaceable; the basic rule to follow here is - don’t keep all your eggs in one basket. We always make sure we have multiple copies of all laptop content, including photographs of diary pages (fortunately). One copy is hidden deep inside the car and certainly isn’t locatable in a ten minute break-in. This solution is still not great if someone takes the entire vehicle. To resolve this potential problem we also back up our files and photographs frequently to the ‘Cloud’, this is painfully slow in most countries due to internet speeds and is not really appropriate for larger files like film footage. Backing up to SD or Micro SD cards and posting home is also a fairly secure alternative, if somewhat costly, the drawbacks with this are that many postal systems are fairly unreliable in other parts of the world. Being married to a compulsive list maker has its benefits; Emma had made a full inventory of every item in the car and in which box it was placed, neatly organised into a deftly formatted spread-sheet stored on our micro SD cards. This simple procedure made identifying what had been taken a fairly quick process. This list was then swiftly given to the police. In hindsight it would have been beneficial to have a photograph of every item we carry as the police requested information regarding some of the more unusual or easily recognisable items that were taken. All the rear windows of our car are completely blacked out using thick self-adhesive black vinyl, this does two things, it keeps inquisitive eyes out and also makes the glass a little harder to smash. Most thieves are opportunistic, if items are out of sight this is a great first step to securing your vehicle. All our external accessories like jerry-cans and the Hi-lift jack are all secured with heavy-duty cables and waterproof padlocks. Our vehicle is fitted with an immobiliser, I would also recommend installing another hidden battery isolator switch to completely kill all electrics to the vehicle- this would also be handy when working on the car. As for personal protection, we carry very little. In the tent at night we opt for WD-40 (although it’s not mentioned as one of the 2000+ uses on it’s website), a screeching rape alarm and a fairly hefty Maglite. Being lovers not fighters, we took a few self-defence classes before we left on our trip. Some overlanders carry pepper spray, but this can be problematic crossing borders in some countries. What We Have LearntThere are many things you can do to protect yourself, your possessions and your vehicle. Avoiding putting yourself in a risky situation is always the first step, followed by security should you be robbed. Having simple rules, being aware of your environment and trusting your instinct hugely reduces your chances of being targeted. Prior to Iran, sticking to our self-imposed rules, we’d travelled through 45 countries without a hitch. Simply being aware of threats in your local area is often enough to keep you safe. In Russia for example we were warned by truck drivers to be aware of scam pleas for help by distressed smartly dressed men at the side of the road. Local knowledge is extremely valuable but be aware that most people will exaggerate the dangers and untrustworthiness of people in neighbouring countries! Careful selection of wild camping spots is vital; we always make sure no one sees us leave the road and try to remain out of sight from roads and habitation. It is important to maintain a level of security in your vehicle that does not become a hindrance on a daily basis but is secure enough to ease your mind when the vehicle is unattended. There are times when you have no choice but to be away from the vehicle and it is during these times that your security options need to be religiously enforced. It’s nigh on impossible to make your vehicle completely burglar-proof, ultimately if someone wants to get into your car, they will. All a thief needs is time and an opportunity, the more you can do to increase the time needed to get into the vehicle the less the opportunity exists. Your vehicle should appear to be a hard target, this will deter most criminals who will look for an easier target. Most people tend to prioritise securing items that are perceived as valuable; laptops, cameras, phones, GPS, etc. The logic here being that no one is going to want to steal used maps, personal diaries and prescription glasses. The truth of the matter is, thieves are generally indiscriminate. In our case they simply took all they could in the time they had. Storage boxes are practical but they certainly made it easy for the thieves to empty our car. In this regard maybe a fixed and lockable draw system is more secure. In hindsight we should have treated items like diaries and prescription glasses in the same way we dealt with other ‘valuables’. If you need glasses to drive and someone takes them you have a big problem. Thankfully I always have a pair stuck to my face and keep my prescription details on my micro SD card. There are many smaller products on the market that are useful for overlanders including Baked Bean tin safes, these can be hidden amongst your food stash and are great for hiding smaller items. Combination key safes can be bolted or welded to the underside of your car and can hold a full set of spare keys in case you manage to lose your keys. External heavy-duty commercial van door hasps are somewhat unsightly but they are also a great security addition, especially in conjunction with a draw system that can’t be accessed whilst the doors are closed. If a thief smashes a window they won’t be able to open the doors which in turn means they can’t access the draw system. This set-up should prevent the thieves from taking anything at all. Most car thieves are small-time opportunistic criminals but in some extreme cases your vehicle may be targeted by a more professional outfit who actually want to take the entire vehicle. The simplest way to prevent this is not to leave your vehicle in the same place for more than one day. Think carefully about promoting your overland website and blog on your vehicle. Most overlanding websites like to feature photos of the vehicle build, storage systems and the equipment carried, this information can easily be used by would-be criminals who spot your vehicle. If you can afford it, a hidden GPS tracker on your vehicle might save you one very expensive loss. We also recommend downloading one of the many remotely operated tracking and recovery apps that are available for most smart phones and laptops. In ConclusionIt is important to address security issues when prepping your vehicle; window grills, secure cages, safes and locking draw systems are easily available for vehicles like Defenders but are not commonplace in the UK for Toyotas like ours. You don’t need to spend a small fortune to be protected; simply having a few simple self-imposed rules is the greatest way of keeping you and your vehicle safe. Unfortunately we broke our rules and paid the price for doing so. Thankfully the people of Iran and our friends back home proved how amazing they are and came to our rescue helping us source and replace many of the items that were taken.
Fortunately the robbery didn’t dampen our adventurous spirit. It’s important to remember that most overlanders don’t ever fall victim to crime and the majority of people round the world are wonderfully friendly and honest.
0 Comments
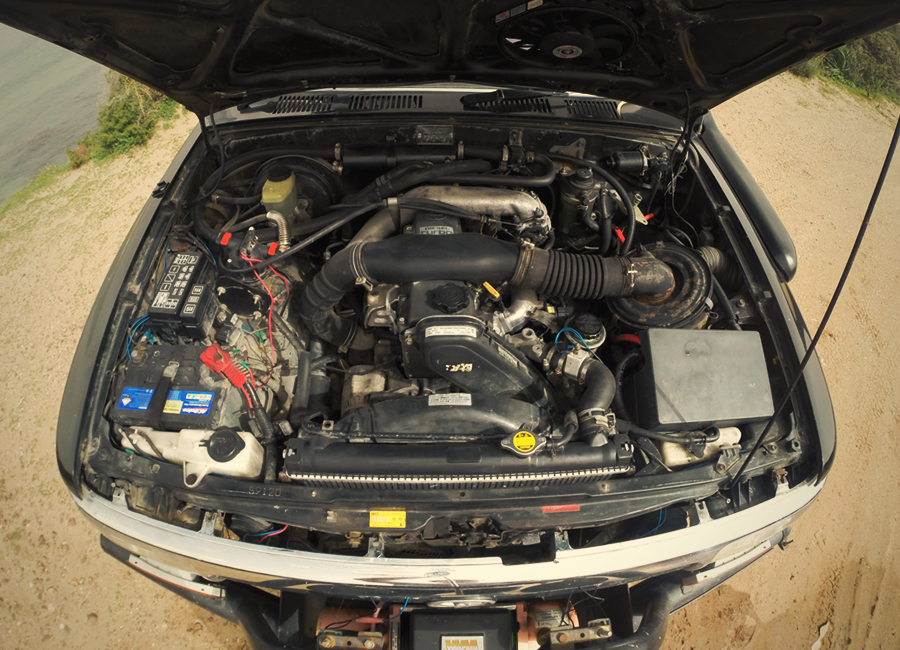
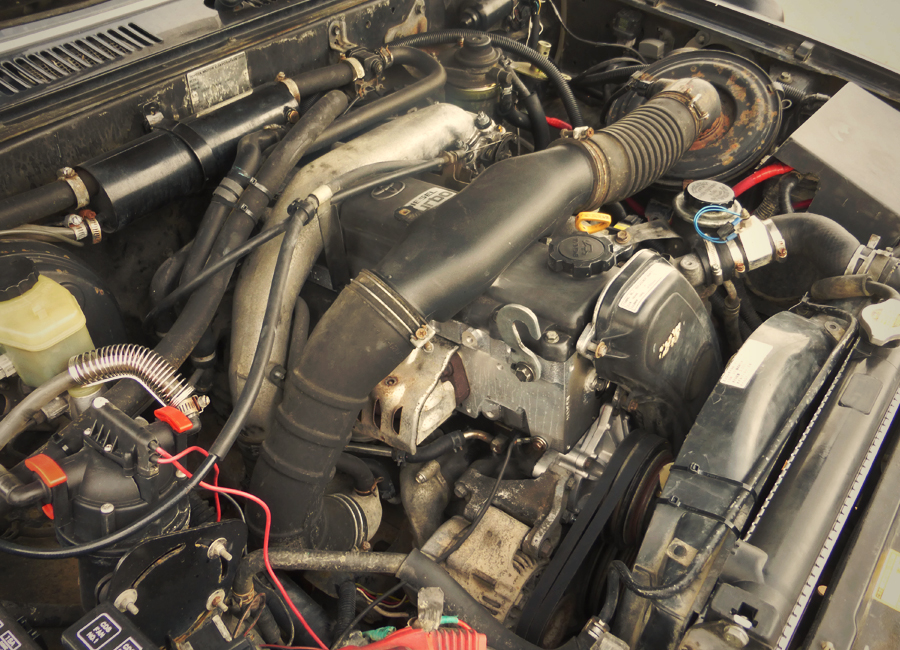
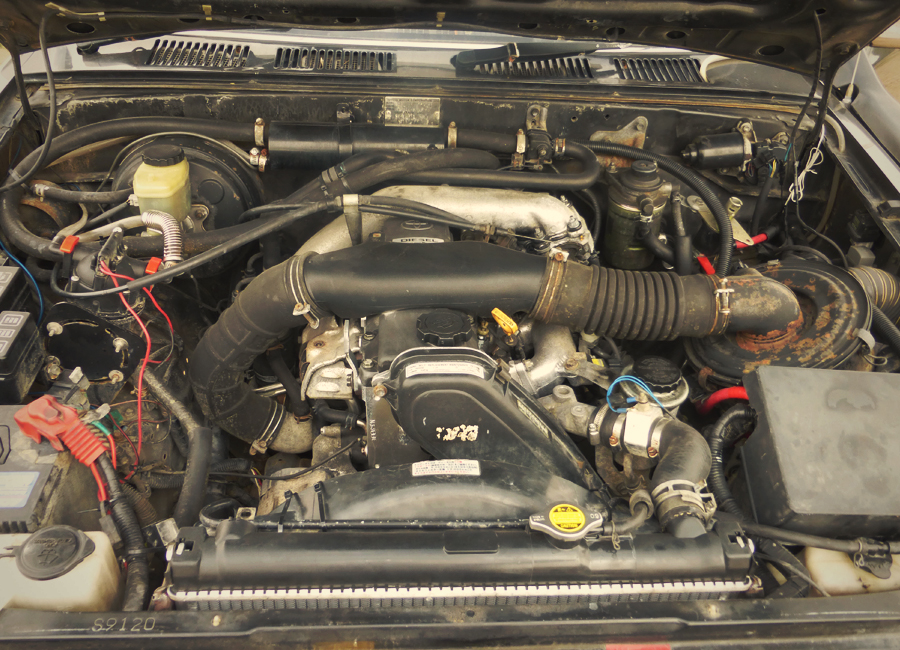
After a short hibernation period were about to head back out on the road. Bee-bee’s cracked cylinder head has been replaced and she is raring to go (we hope). Here’s a quick outline of the work she’s had done... New Cylinder Head
Water Pump
Radiator
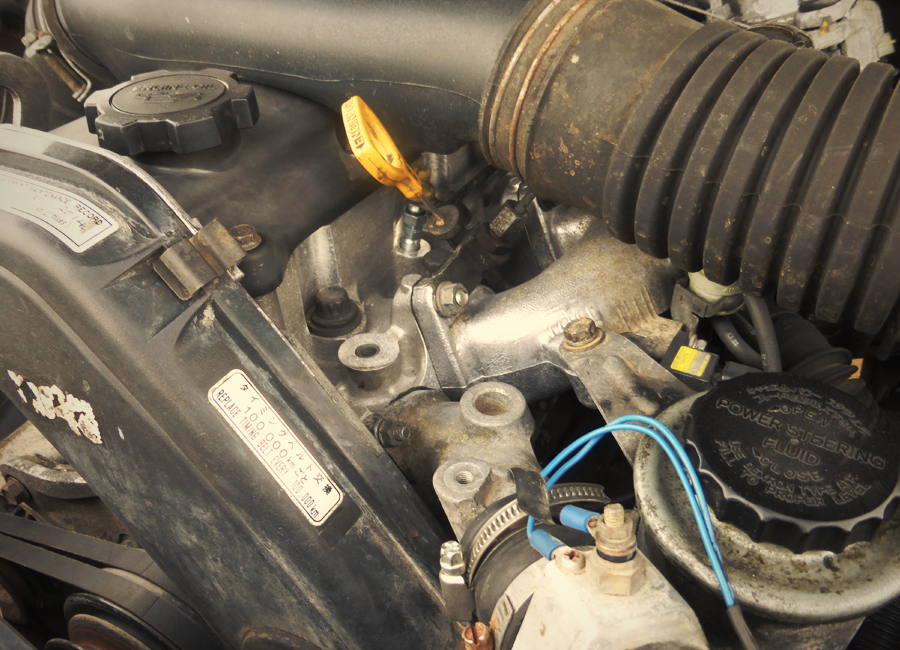
Cam Belt, Glow Plugs and Fuel Injectors
Having racked up over 150 test kilometres I’m pretty convinced she’s running sweeter that she ever has. She starts on the button, no more black smoke and the temperature barely rises above 88°C. We took her (unloaded admittedly) on several long motorway climbs and up a steep 290 metre off-road climb without any problems at all. Fingers crossed.
Bee-bee certainly picks her moments… The first time she broke down was in Russia when the alternator died and the battery ran flat leaving us stranded across a railway line!
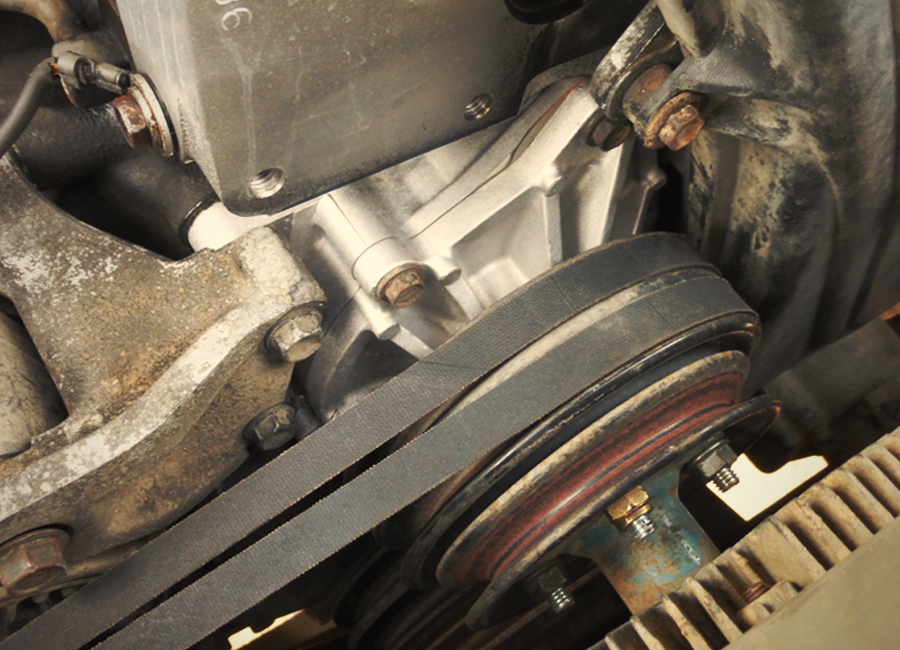
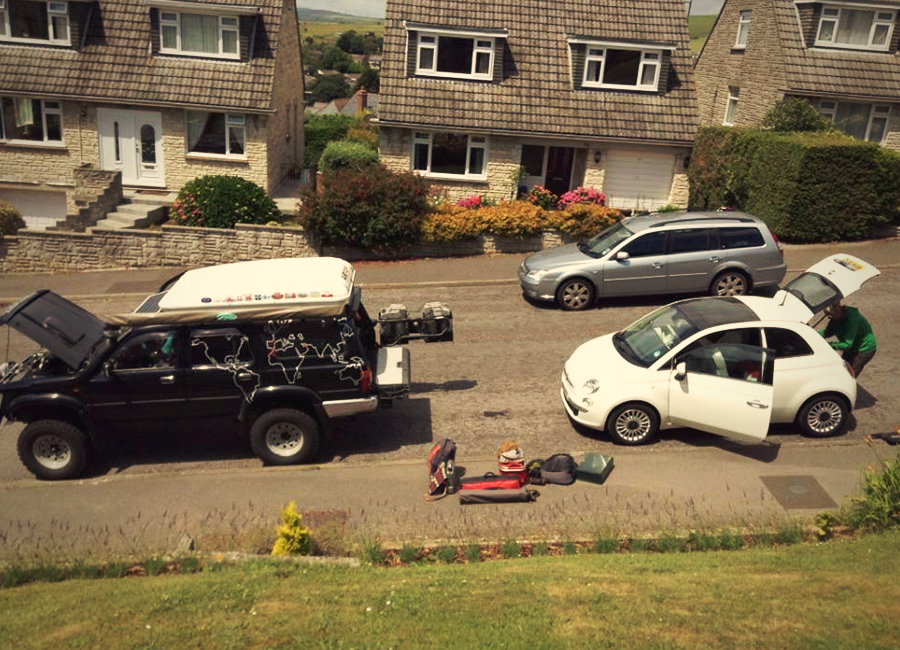
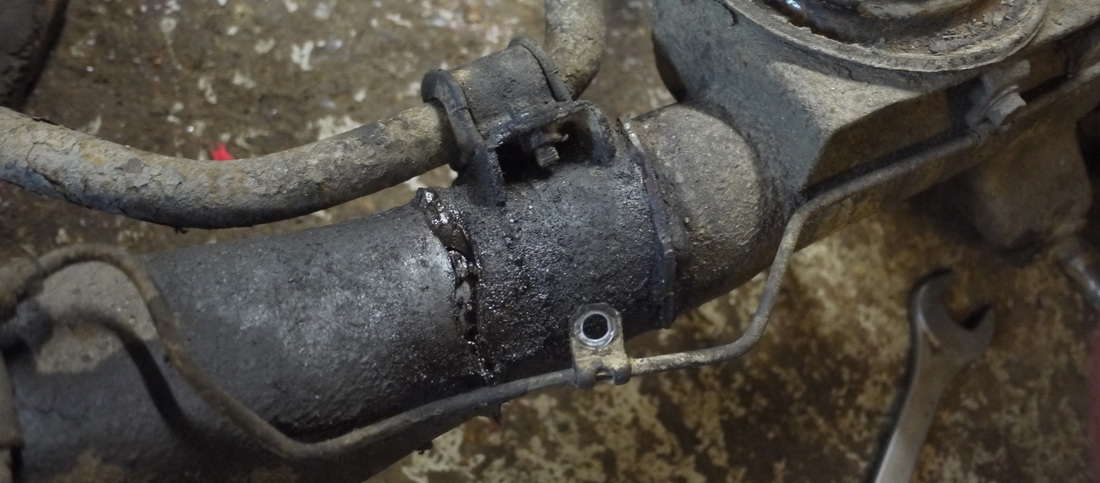
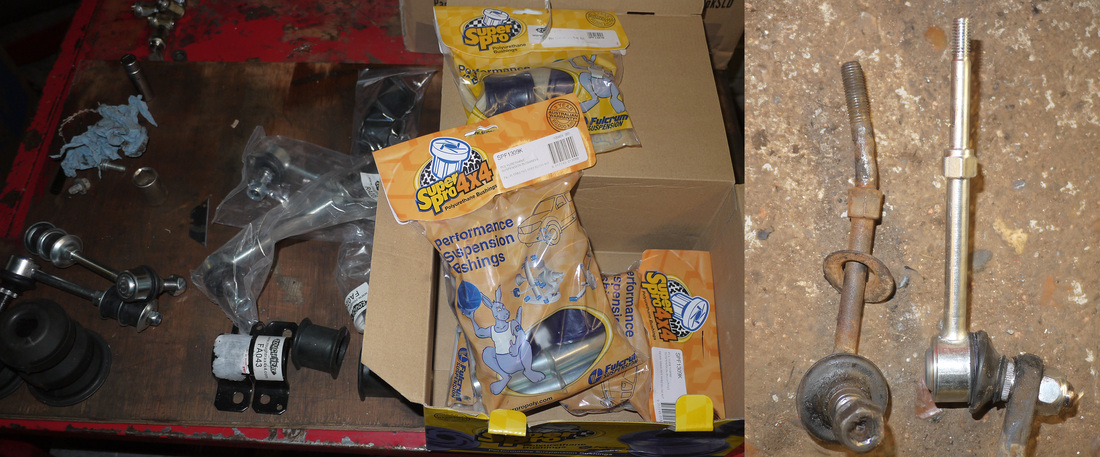
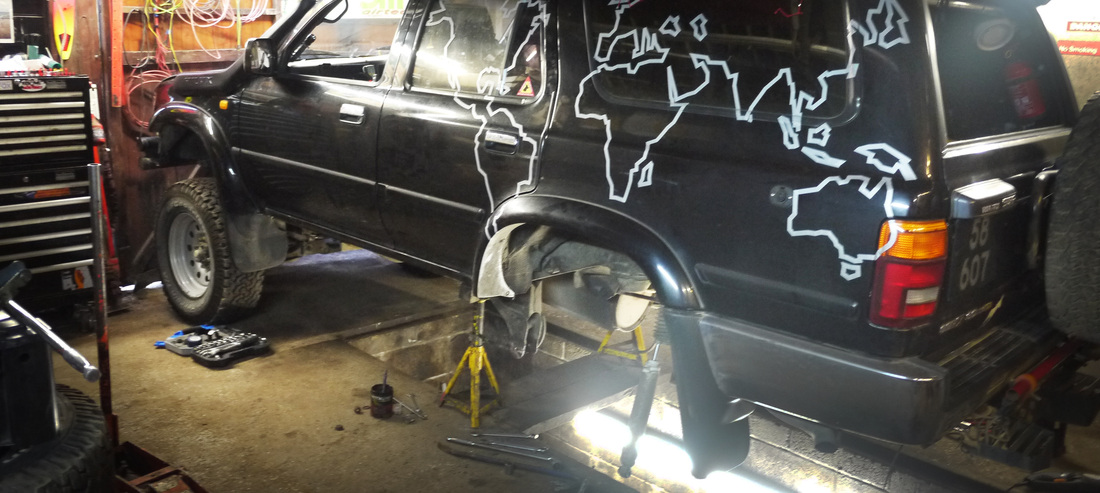
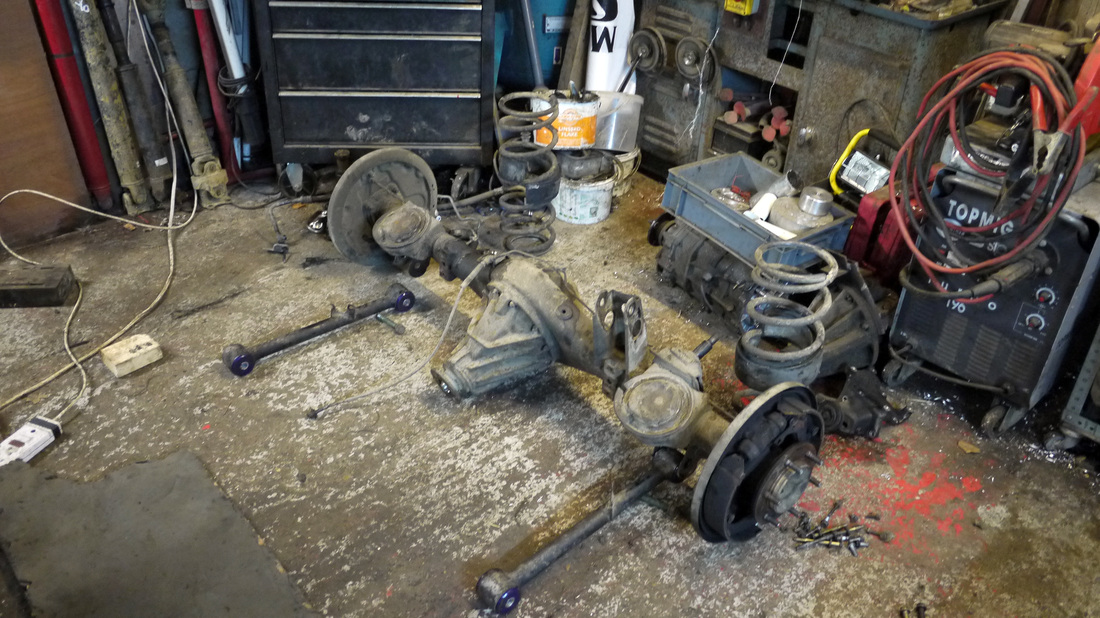
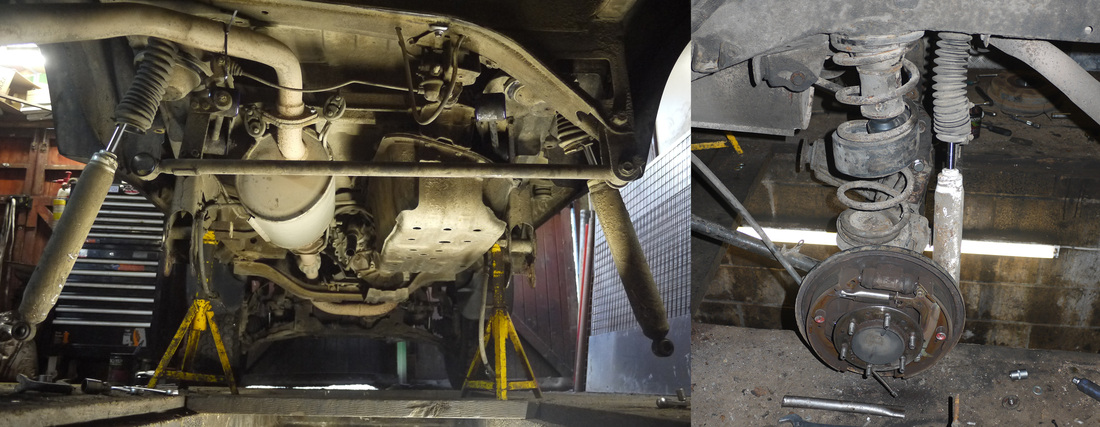
Last weekend she again threw her toys from the pram at the most opportune moment! On Saturday prior to leaving for a family camping trip she refused to start. The car was packed, the fridge was loaded, the batteries were charged, she turned over, but just refused to start. On closer inspection I noticed the glow-plug warm-up light wasn’t coming on either. After a few checks with the meter and a quick visit to the Hilux Surf Forum I diagnosed the problem as the Electronic Control Unit (ECU). Hopefully. It seems that it’s a common problem with at least two other people on the forum suffering the same fault this year. As it’s Bee-bee’s 20th birthday this year I’m wondering if Toyota have programmed a self-destruct sequence into the ECU! So with a little white hire car in place we headed off camping with my nieces while Bee-bee missed out on all the fun, sat inactive and sulking on the driveway. The trip was planned to not only spend time with family but to also road-test all our kit prior to setting off again. The ECU has now been sent to the highly recommended ECU-Doctor. With a car our age these kinds of parts are not available new anymore. Buying one from a broker is risky, so the best course of action is to get the ECU repaired and remapped. The ECU-Doctor can diagnose and confirm the suspected fault, repair it and offer a 12-month guarantee in the process. Let’s hope I’ve diagnosed it correctly and that he can work his magic on Bee-bee’s brain! Prior to our Truckin’ hell we’d made the decision to head straight back home; unfortunately we were 8000 miles away in Mongolia. In hindsight our departure from Mongolia was probably a little too hasty; a bit more Dakar Rally than Mongol Rally. Bad roads coupled with some wannabe Sébastien Loeb-esq driving damaged Bee-Bee’s rear axle. Luckily my daily under-car crawl exposed the hairline crack in the right-hand side upper trailing arm mount early on. The part that had cracked is essentially one of four main connections holding the entire rear axle in place. The discovery was an unnecessary blow – talk about kicking a man when he’s down! Due to the remoteness of our location we had no choice but to lash up the mount with a heavy-duty ratcheting cargo strap and hope for the best. I kept a close eye on it over the following 300 miles of bad road. It gradually got worse, by the time we arrived in Russia the mount had completely sheered off but luckily the pot-holed corrugated dust roads of Mongolia had been replaced by relatively smooth Russian tarmac. The ratchet strap was now holding everything tight in place. A weld job would mean we’d lose a valuable day’s driving and a complete axle replacement would mean we’d lose a good week. Given the situation and the need to be with my parents we re-evaluated our options and decided the temporary fix was secure enough to last the journey home; it did. Macgyver would be proud! On our return to the UK we started the process of getting Bee-Bee back into ‘adventure’ shape. A new axle was sourced from Jap 4x4 Parts and a visit to the Hilux Surf Forum secured a date with Tony the Hilux Surf oracle. Whilst the axle was off it made sense to replace anything that might have already taken a battering. A visit to Rough Trax secured a Super Pro polyurethane rear panhard rod & trailing arm bush kit, some new bump-stops, anti-roll bar bushes and a couple of front anti-roll bar link rods which had also taken a battering. The axle swap was fairly straightforward, especially with Tony’s knowledge. One area that could have been problematic was swapping the trailing arm bushes. Luckily Tony has access to a 25 tonne press and a lathe. The press ram was a little too large for the bushes so Tony hit the lathe and knocked up a couple of male and female adapters to fit either side of the bushes. With the press the old bushes popped out pretty easily and the new ones straight in. We had trouble undoing a couple of bolts, reminding me of the importance of Copaslip, nothing the reciprocating saw couldn’t deal with though. When replacing axles on 4x4 vehicles it is important to check the diff ratios are the same, if not you’ll have back wheels that’ll want to turn at a different speed to the front wheels making for a very interesting ride. On a Toyota this information can be found on the VIN plate in the engine bay. The axle code is four digits, ours is G294, this translates to a differential size of 8.0", final ratio of 4.1, and a 4 pinion set up. This website was very useful for translating the code. You can also double-check the ratio as Toyota colour code the end of the diff, double check the two axles are the same and you should be right! When fully loaded Bee-Bee has always had a bit of a saggy back end. Whilst we had the springs out we fitted a pair of spring assisters to help firm up the already upgraded springs. A couple of days in the workshop gave us a great opportunity to not only replace the axle but complete a few other jobs refining Bee-Bee’s status as number one adventure mobile. One modification we carried out was to remove the air-con unit and air-con radiator. This would improve access to the alternator and improve airflow through the main radiator as well as removing one of the three fan belts (less to go wrong and less to carry). The left over air-con electric radiator cooling fan is now acting as an emergency, manually operated cooling fan aimed at the main radiator. Whilst the main radiator and fan were all out we topped up the oil in the viscous fan. This modification is a very simple but effective one. The fan on these vehicles is of the viscous type. This means that is has an oil operated clutch in it. When the engine heats up, the oil changes consistency and the fan starts to grip more and turn faster. The oil in the fan can be replaced with a different consistency making it kick in slightly earlier, cooling the engine more effectively.
The mods to the cooling system now make a noticeable difference to Bee-Bee’s running temperature and we have the option of turning on the electric auxiliary fan when the temperature starts to rise too. If you want to read more about some of the other cooling mods we’ve made to deal with the extra weight, click here. Andy Last weekend, little Bee-Bee spat her dummy from the pram for the first time. I had spent the day clay pigeon shooting and boozing on the little island of Herm, on my return to Guernsey, Emma drove Bee-Bee into town to pick me up from the pub. When it was time to leave Emma went to start Bee-Bee and all we got was the dreaded solenoid click. By this time the days drink had caught up with me and I wasn’t on my top car fixing form.
The lights, windows, etc worked and so the batteries (our Surf is fitted with a winter kit which means it has two starter batteries for extra ummmph) were not completely flat. Although being a little drunk I still knew that this didn’t actually mean a thing, to start the car uses ALL the power and if the batteries had run down just a little they might not have had the kick to get the starter motor going. In my inebriated state I did the classic repeating myself thing, and constantly asked Emma if she had left the lights on. Luckily with the bonnet raised someone recognised the international symbol for ‘car help needed’ and offered a jump start (from a smug Range Rover owner no less). We rolled the car back and attached the jumper cables. Still the starter motor just clicked away. I tried knocking the starter motor with a hammer to try and get the solenoid to engage, I also tried rocking the car back and forth in gear a few times too. The Range Rover owner left and two minutes later someone else offered a jump start, again nothing helped. In the end trying to fix a car in the dark, wet (it was raining...I hadn’t pee’d myself) and whilst drunk seemed a little pointless and so we pushed her back into a car park space and got a taxi home. The next day with a clear head, daylight and a few tools we headed back down to the car. We initially tried turning the key in the hope that she might have magically fixed herself, but all we got was the dreaded click, click, click, click. A quick mooch under the bonnet revealed one of the two fan belts that run to the alternator had snapped. The Surf has a three belt system (one for the air con and two for the alternator/water pump) so that if one snaps, the remaining belts will still power the water pump so the car won’t over heat. The remaining belt that was running to the alternator was loose and more than likely turned the alternator but not enough to maintain a regular charge to the batteries. After a bit of tinkering and some butchering of some incredibly cheap jumper leads we managed to fire Bee-Bee up by jumping her off our Toyota MR2. I’m still a little confused why the Range Rover didn’t chuck out enough power to get her started whilst the little battery in the MR2 did the job fairly easily. Anyway she was running and we managed to get her home. I ordered a belt kit with the plan to change all three belts whilst I was at it from Rough Trax. Two days later the belts turned up, along with a new heavy duty set of 3m jumper cables. I also collected my multimeter from work, with the plan of testing the alternator, starter motor and batteries properly. I had Friday afternoon off work and decided to get busy on the belts. This was the first time I had worked on Bee-Bee properly and everything was going swimmingly, a few bolts were a bit awkward to reach but nothing out the ordinary...until! I got to the point where it was time to put the new belts on, the alternator was as loose as it would go on the adjustors but the belts seemed to by mm’s too short. I had no doubt that the belts weren’t correct as Rough Trax specializes in Hilux Surf’s. The only reason I could think of was that because the alternator had recently been replaced and that maybe the new one was not a stock Toyota part and the spacing was set-up slightly differently. Anyway after an hour of trying every trick in the trade to get them on I decided I had enough for one day as the light was dropping. Feeling very disheartened I hit up the Hilux Surf forum with the hope that someone else had encountered the same problem and that the answer was awaiting me in html format. No such luck. In bed that evening I had a bit of a brainwave; if I removed all the alternator bolts rather than just releasing the tension on it, then I could angle the alternator, hook the belts over and bolt it back in place with the belts on. In theory it seemed like a good idea. On Saturday morning I logged on to the forum again and posed the question, being slightly impatient I didn’t bother waiting for anyone to reply and decided to just crack on with it. The alternator is held in place with just two bolts; one acts as a pivot and attaches it to the engine whilst the other bolts it to the tension adjustment set-up. It was a bit of a squeeze to reach both of these but they came out without too much of a fight. The alternator on the other hand was well and truly wedged in place between both sides of the pivot bracket, with some seriously wiggling/prying it dropped out. Having the alternator loose meant that it was easy to hook the two fan belts over the pulley. When came the time to put the alternator back I was faced with yet another problem. The mount on the engine block where the alternator pivots has a shim in it that tightens up against the alternator to clamp it in place when you tighten the main alternator bolt. This shim was wedged in position, to the point where I wasn’t even sure it was supposed to move. The shim being wedged in place meant getting the alternator back in between the mounts was nigh on impossible. Again I went to the forum for help, and again being impatient I didn’t wait around for an answer. I popped to the hardware store and bought a nut, bolt and washer set-up with the idea of sandwiching the shim back in place by tightening the nut and bolt through it. It worked, with the shim back in the open position it gave me loads more room to play with and slipping the alternator back in with the belts on was a piece of cake. The second bolt was a little more annoying to get in but it went with a bit of persistence. After that everything went back together fairly straight forward. Once back together with the batteries in place I checked them with the meter and discovered they still had just under 12v in them. I tested the new jumper cables and she started first time, I checked the meter reading again and the batteries read at 14.3v so no problems with the alternator. I left it running for 10 minutes to build up some charge and switched her off and tried her again, she started first time. So what should have been a simple 30/40 minute job turned into about a 3 – 4 hour job. Once I had finished I checked back on the forum and discovered that a few people had commented on my post, most advised it was a bad idea and pretty much not possible. So despite all the problems and against the odds I was just happy that I managed to find a way to do it. Although in hindsight there may have been an easier way to do it by removing the water pump pulley and hooking the belts over. Anyway, it has been about 10 years since I have worked on any cars and if I had not been able to sort this it would have really knocked my confidence. One thing it has taught me is that improvising works but having the correct tools for the job really speeds up the process and lessons the stress. Andy |
Archives
July 2020
Categories
All
|
Proudly powered by Weebly


 RSS Feed